
Chocolate Crème Brûlée Casserole (Inspired by Toothsome Chocolate Emporium)
This recipe exists because of a dessert I still think about.
A few months ago, my husband and I went to The Toothsome Chocolate Emporium outside of Universal Studios, and I ordered what may very well be the best dessert I’ve ever eaten: a chocolate crème brûlée. It was deeply chocolatey, silky smooth, and topped with that perfectly crisp caramelized sugar shell.
When we got home, I kept craving it, but knew I couldn’t justify flying back out to L.A. just for a dessert — so naturally, I started researching recipes and tried to recreate it. This recipe is inspired by Inspired Taste‘s chocolate crème brûlée, but adjusted in small ways that make it taste even more like that unforgettable dessert in L.A… and scaled up into a casserole-style crème brûlée that’s perfect for parties.
It’s rich, elegant, and a little “extra” in the best way — the one where everyone asks how to make it after they eat it. While it’s definitely not plant-based, or even remotely healthy, it’s my most-requested holiday dessert, and I bring it to nearly every Christmas party I attend.
Why a Crème Brûlée Casserole?
You can absolutely make this recipe in individual ramekins for a traditional crème brûlée — and I’ll explain how below — but I personally love the casserole version for a few reasons:
- It’s a total show-stopper for parties
- No juggling 10–12 ramekins
- Easier to transport
- And the biggest? I only own two ramekins, and you need at least 6 for this recipe. 👀😅
It turns a classic, elegant dessert into something bold, shareable, and memorable.
Ingredients
- 4 cups heavy cream (32 oz container)
- 1 cup sugar, divided (plus more for topping)
- ¼ tsp salt
- 9 egg yolks
- 1 cup dark chocolate chips
I love Bake Believe dark chocolate chips from Costco or Sam’s Club. - 1½ Tbsp pure vanilla extract
How to Make Chocolate Crème Brûlée Casserole
1. Prep the oven + water bath (important!)
Preheat your oven to 300°F.
Boil a few cups of water (or microwave it) so it’s ready for the water bath. (Water baths are essential for crème brûlée — they allow the custard to cook gently and evenly without curdling or cracking.)
2. Heat the cream
In a saucepan, combine:
- heavy cream
- ½ cup sugar
- salt
Bring to a gentle simmer, stirring frequently. Do not boil.
3. Prepare the egg mixture
Separate 9 egg yolks into a bowl.
Beat with the remaining ½ cup sugar until slightly thickened.
4. Soften the chocolate
Microwave chocolate chips at half power, either:
- two 30-second increments, or
- 20 seconds at a time at full power
They should be soft and melty, but not scorched.
5. Temper and combine
Slowly pour about half of the hot cream into the egg yolks while whisking continuously to temper them.
Pour the remaining hot cream into the softened chocolate and beat until fully combined.
Combine both the egg and chocolate mixtures, add vanilla, and mix until completely smooth.
6. Water bath + Straining Custard
Pour the boiled water into the outer/larger casserole dish until about half full.
Place the smaller baking dish or ramekin into the water bath. Make sure the water comes up about 3/4 of the height of the smaller dish (but not so full that you’ll spill boiling water on yourself when you move it into the oven!)
Pour the custard through a fine mesh strainer into the casserole dish or ramekins.
(This step gives you that ultra-silky, restaurant-quality texture.)
(This step gives you that ultra-silky, restaurant-quality texture.)
Skim off any foam or bubbles from the top — and yes, you can eat it. Its too good to waste.
7. Bake
Bake at 300°F for about 40 – 50 minutes (if using individual ramekins, shorten time to 20-35 minutes.) Bake until the internal temp is between 170–175°F.
It will:
- still wobble like Jell-O
- look slightly underdone
- not be fully set yet
That’s exactly what you want.
8. Chill
Refrigerate for at least 2 hours, or overnight.
The custard will fully set as it chills.
9. Brûlée right before serving (very important!)
Sprinkle a thin, even layer of sugar over the top and torch until deeply golden and crisp. (This is the torch I bought just so I could make this!)
Tip: ramekins only take a few seconds to torch, but the casserole dish takes maybe 10? So plan your time accordingly if you have an event you’re making it for!
Why you should torch right before serving:
The caramelized sugar crust is hygroscopic — meaning it pulls moisture from the custard underneath. If you torch it too early, the sugar will soften, melt, and lose that iconic crack.
👉 For best texture:
- Torch right before serving, or
- No more than 1 hour ahead (max)
No torch?
Broil on the top rack, watching very closely, rotating as needed. Remove immediately once caramelized.
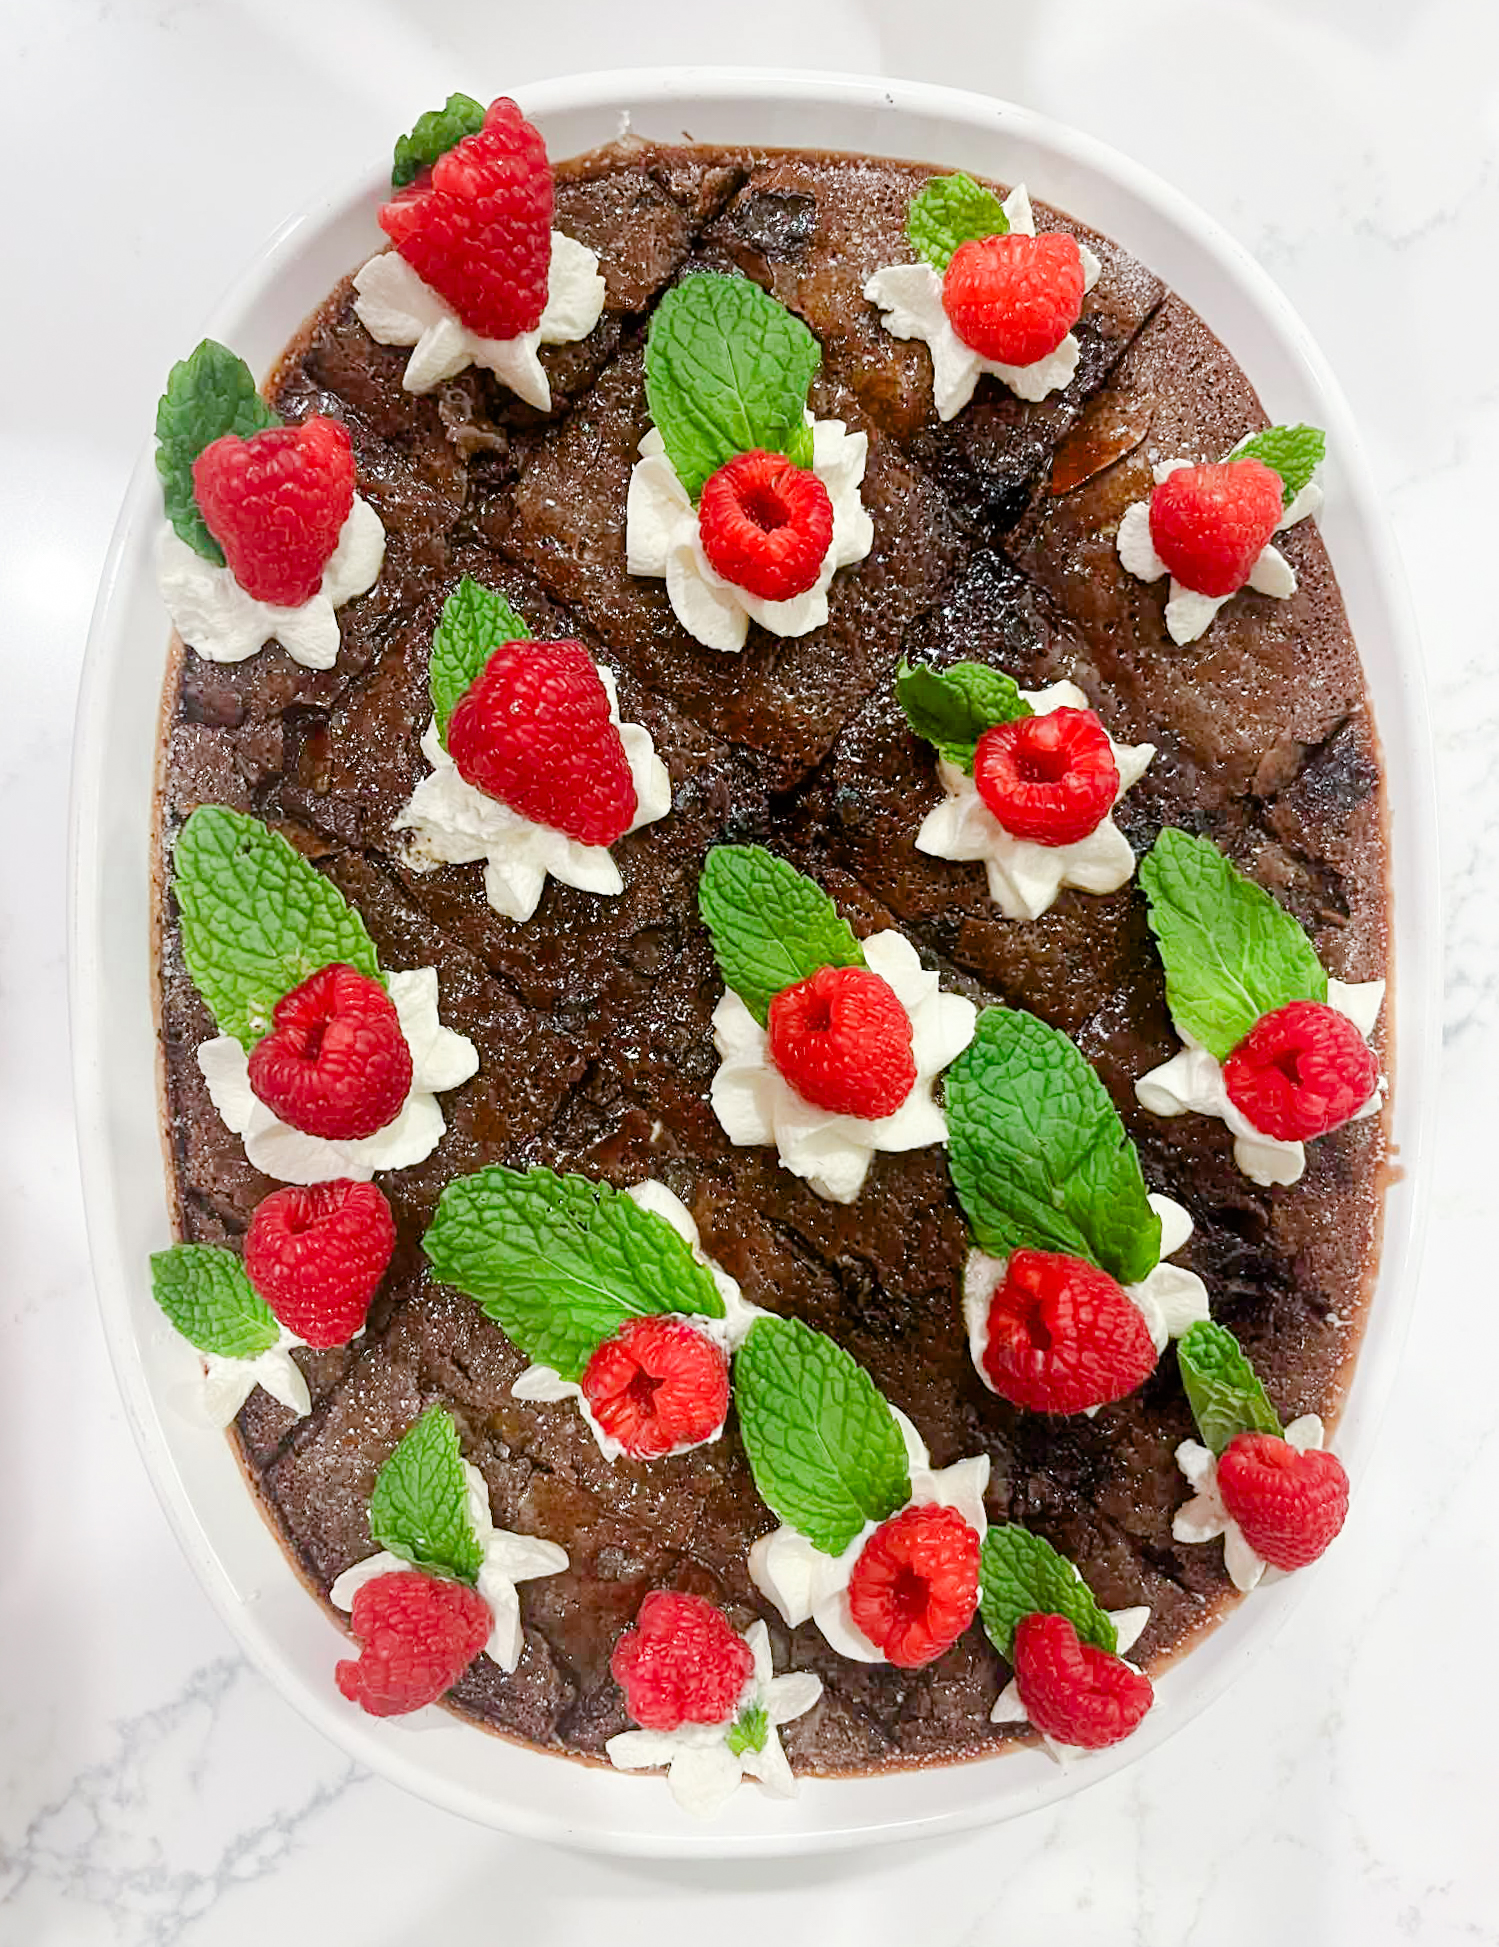
Holiday Topping Ideas
For Christmas, I love topping this with:
- whipped cream
- fresh raspberries
- mint leaves
The red and green contrast against the dark chocolate custard is stunning and festive.
Whipped Cream Tip (Make It Hold Its Shape!)
If you want your whipped cream to stay firm — especially if you’re piping it or serving this at a party — mix a small amount of cornstarch into your powdered sugar before whipping. The cornstarch acts as a stabilizer, helping the whipped cream hold its shape longer without tasting gummy.
How I do it:
- For every 1 cup heavy cream, use
- 2-3 tablespoons powdered sugar
- 1/2 – 1 tbsp cornstarch (whisked into the powdered sugar first)
Whip to medium-stiff peaks.
For an extra fancy finish, I like to pipe the whipped cream using a large star-shaped piping tip — it gives that bakery-style look and makes the dessert feel even more special with very little extra effort.
Tips for Success
- Always use a water bath — this is non-negotiable for smooth custard
- Bake low and slow at 300°F
- Strain the custard for best texture
- Torch at the last minute for a crisp sugar shell
- Don’t panic if it looks underdone — chilling finishes the job
Serving + Storage
- Serve chilled with berries or whipped cream
- Un-torched custard keeps up to 3 days in the fridge
- Once torched, serve within 1 hour ( You can still eat it after this, but the sugar shell will soften.)
- Do not freeze (custard texture will suffer)
Whether you serve this as a traditional crème brûlée in individual ramekins or as a dramatic, family-style casserole, this dessert is meant to be shared and remembered. It’s rich, indulgent, and a little bit over the top — the kind of dessert that makes people pause, crack the sugar crust, and immediately ask for the recipe. This might sound dramatic, but every time I make it, I’m reminded of the awe I felt for that unforgettable dessert at Toothsome Chocolate Emporium, and I love being able to recreate a little piece of that magic for our family and friends. If you’re looking for a dessert that truly feels special — especially for the holidays — this chocolate crème brûlée is one you’ll come back to again and again.
